這篇文章要記錄幫好友設定,將 Linux 的資料定時 備份 到 Synology NAS 上,試圖透過 Synology Drive 來幫忙做檔案版本的控管。
這篇文章查了一些資料,參考了 如何將資料從 Linux 裝置備份至 Synology NAS? Linux 使用 rsync 遠端檔案同步與備份工具教學與範例、Using SSH key authentification on a Synology NAS for remote rsync backups、 Logging RSYNC output to file、Linux 設定 crontab 例行性工作排程教學與範例,加上小蛙自己設定時候遇到的狀況,留給有需要的朋友參考。
Synology NAS?
Synology NAS 提供了很方便的 client,在有 GUI 的環境裡直接設定好目錄,只要檔案有所變動就會自動同步到 NAS 上,而且跟 Google 雲端硬碟一樣,檔案每次變動的歷程都會記錄著,如果檔案改壞了要找回某個時間點的版本,超級方便!雖然 client 也支援 Linux,不過沒有 GUI 的 Sever 版本就沒有了,只適用於有桌面環境的 Linux。

沒有桌面環境的 Linux 怎麼辦?
沒有桌面環境的 Linux 也不用擔心,像小蛙今天要使用的就是沒有桌面環境的 Ubuntu 16.04 LTS,Synology 官方的文件提到可以用 CIFS 或 NFS 掛載的方式,或是不透過掛載,直接將資料 rsync 進 NAS 裡,雖然一樣可以將資料同步到 NAS 裡,但跟官方提供的 client 比起來,少了檔案變動會自動同步的功能,必須要自己設定 crontab 定期進行同步 (雖有一點不怎麼完美,但比完全用不了又好上不少!)
操作主要分成 NAS 環境上的設定以及要同步伺服器上的設定,有些步驟會交叉到,小蛙就順著流程講下去。
開啟 rsync 服務
首先開啟瀏覽器用在 administrators 群組內的使用者登入 NAS -> 控制台 (1) -> 檔案服務 (2) -> 啟動 rsync 服務 (3) -> 套用 (4)

指定 rsync 權限給特定使用者
進入使用者帳號 (1) -> 選取要使用 rsync 的使用者 (2) -> 點擊編輯按鈕 (3)

設定可讀寫的資料夾,切換到權限頁籤 (1) -> 找到要 rsync 的使用者,將可讀寫打勾 (2) -> 按下確定

為了要讓 rsync 免輸入帳號密碼,在這邊先暫時把要進行 rsync 的帳號加入 administrators 群組,等等完成設定後再還原設定。

開啟家目錄與資源回收桶
小蛙原本接手的時候這兩個都沒開,家目錄如果沒開的話會造成 SSH 沒辦法不輸入帳號密碼自動登入,而資源回收桶沒開的話則會無法留住刪除檔案的記錄,如果誤刪檔案時還能救回來,非常方便建議打開。
回到控制台 -> 進入使用者帳號 (1) -> 上方進階設定 (2) -> 拉到最下面把啟動家目錄服務 (3) 及 啟動資源回收桶 (4) 都打勾,點選下方套用。

啟用 SSH 功能
回到控制台左側選單拉到最下面的終端機 & SNMP (1) -> 啟動 SSH 功能 (2) -> 套用 (3) 來開啟 SSH 功能

測試使用 SSH 登入
現在到要進行檔案同步的 Ubuntu 中進行連線測試,此刻還是要輸入密碼的,如果剛剛沒有將此帳號加入 administrators 群組,這邊就會出現連線被拒絕無法連線的錯誤,如果畫面跟小蛙一樣可以連進去就表示以上的設定都是正確的。
root@xxx:~# ssh myaccount@nas_domain
The authenticity of host 'nas_domain (xx.xx.xx.xx)' can't be established.
ECDSA key fingerprint is SHA256:xxxxxxxxxxxxxxxxxxxxxxxxxxxxxxx.
Are you sure you want to continue connecting (yes/no)? yes
Warning: Permanently added 'nas_domain,xx.xx.xx.xx' (ECDSA) to the list of known hosts.
myaccount@nas_domain's password:
myaccount@nas_domain:~$
建立基本 SSH 所需檔案
NAS 一開始沒有 .ssh 資料夾,所以我們要建立一個 .ssh 資料夾跟 authorized_keys 檔案,並且設定正確的權限
# 建立必須的檔案與資料夾
myaccount@nas_domain:~$ cd ~
myaccount@nas_domain:~$ mkdir .ssh
myaccount@nas_domain:~$ touch .ssh/authorized_keys

# 設定正確權限
myaccount@nas_domain:~$ chmod 0711 ~
myaccount@nas_domain:~$ chmod 0711 ~/.ssh
myaccount@nas_domain:~$ chmod 0600 ~/.ssh/authorized_keys
設定讓 SSH 接受公鑰驗證登入
預設 SSH 是透過帳號密碼登入的,這邊要免輸入帳號密碼的話,要將設定改成接受特定公鑰登入的方式
myaccount@nas_domain:~$ sudo su
Password: 輸入 myaccount 的密碼
ash-4.3# vim /etc/ssh/sshd_config

# 把下面兩行前面的 # 拿掉後 :wq 存檔離開
PubkeyAuthentication yes
AuthorizedKeysFile .ssh/authorized_keys

# 重啟 sshd DSM 7 以前的
#ash-4.3# synoservicectl --restart sshd

# 重啟 sshd DSM 7 以後的要用這個
ash-4.3# /usr/syno/bin/synosystemctl restart sshd.service

# 退出回到要備份資料的伺服器上
ash-4.3# exit
exit
myaccount@nas_domain:~$ exit
logout
Connection to nas_domain closed.
root@xxxx:~#
建立伺服器公私鑰
回到要進行 rsync 的伺服器上,如果還沒有建立過 ssh key 的話,可以使用 ssh-keygen -t rsa 進行建立 (亦可參考 登入 ssh 免輸入帳號密碼 建立金鑰的方式)
root@xxxxxxx:~# ssh-keygen -t rsa
Generating public/private rsa key pair.
Enter file in which to save the key (/root/.ssh/id_rsa):
Enter passphrase (empty for no passphrase):
Enter same passphrase again:
Your identification has been saved in /root/.ssh/id_rsa.
Your public key has been saved in /root/.ssh/id_rsa.pub.
The key fingerprint is:
SHA256:xxxxxxxxxxxxxxxxxxxxxxxxxxxxxxxxxxx root@xxxxxxx
The key's randomart image is:
+---[RSA 2048]----+
+----[SHA256]-----+
將公鑰複製到 NAS 上
成功建立金鑰後要把公鑰存入前面我們在 NAS 建立的 authorized_keys 裡面
root@xxxxxxx:~# ssh-copy-id myaccount@nas_domain
/usr/bin/ssh-copy-id: INFO: Source of key(s) to be installed: "/root/.ssh/id_rsa.pub"
/usr/bin/ssh-copy-id: INFO: attempting to log in with the new key(s), to filter out any that are already installed
/usr/bin/ssh-copy-id: INFO: 1 key(s) remain to be installed -- if you are prompted now it is to install the new keys
myaccount@nas_domain's password:

Number of key(s) added: 1

Now try logging into the machine, with:   "ssh 'myaccount@nas_domain'"
and check to make sure that only the key(s) you wanted were added.
到這邊就基本完成了,設定正確的話,再試一次真的不用輸入密碼了
root@xxxxxxx:~# ssh myaccount@nas_domain
myaccount@nas_domain:~$
關閉 SSH 及離開 administrators 群組
這時候可以把 myaccount 從 administrators 群組移除比較安全,除非這個帳號有其他需要用到較高權限的地方,別忘了也把 SSH 功能關閉,除非有必要用到才留著。
使用 rsync 同步
輸入以下指令 --delete 意思是同步的話也要把遠端檔案移到資源回收桶,不加 --delete 的話只會把有變動的檔案同步過去,移除的檔案還是會存在 NAS 上喔!--exclude 是要排除不加入同步的檔案 / 資料夾,NAS 上還要排除資源回收桶 #recycle 及 @eaDir 路徑,不然前者會造成刪除的檔案無法找回,後者則是會不停噴錯 (雖不影響使用但看起來很討厭)
-e ssh 是用剛剛我們設定的私鑰進行連線,如此就可以不用輸入密碼,/var/www/ 是要進行同步的路徑,最後面的 mydir/ 是上面設定可讀寫的資料夾
rsync -avh --delete --exclude '#recycle/' --exclude '@eaDir' -e ssh /var/www/ myaccount@nas_domain::mydir/
Logging RSYNC output to file 提到可以加入 --log-file=/path/file.log 與 --progress 可以將執行過程輸出到檔案,不過如果檔案非常大的話,這個 log 檔也會非常大喔!小蛙提供這個做法,可以做完 rsync 之後有個參考依據,知道那些檔案成功哪些檔案出問題,自己視情況斟酌是否加入。
實際測試看看,修改的檔案跟刪除的都成功了!
root@xxxxxxx:~# rsync -avh --delete --exclude '#recycle/' --exclude '@eaDir' -e ssh /root/backup/ myaccount@nas_domain::mydir/
sending incremental file list
./
deleting www1
deleting www
mod-pagespeed-stable_current_amd64.deb

sent 8,311,426 bytes  received 56 bytes  2,374,709.14 bytes/sec
total size is 8,309,240  speedup is 1.00
正式跑起來看看

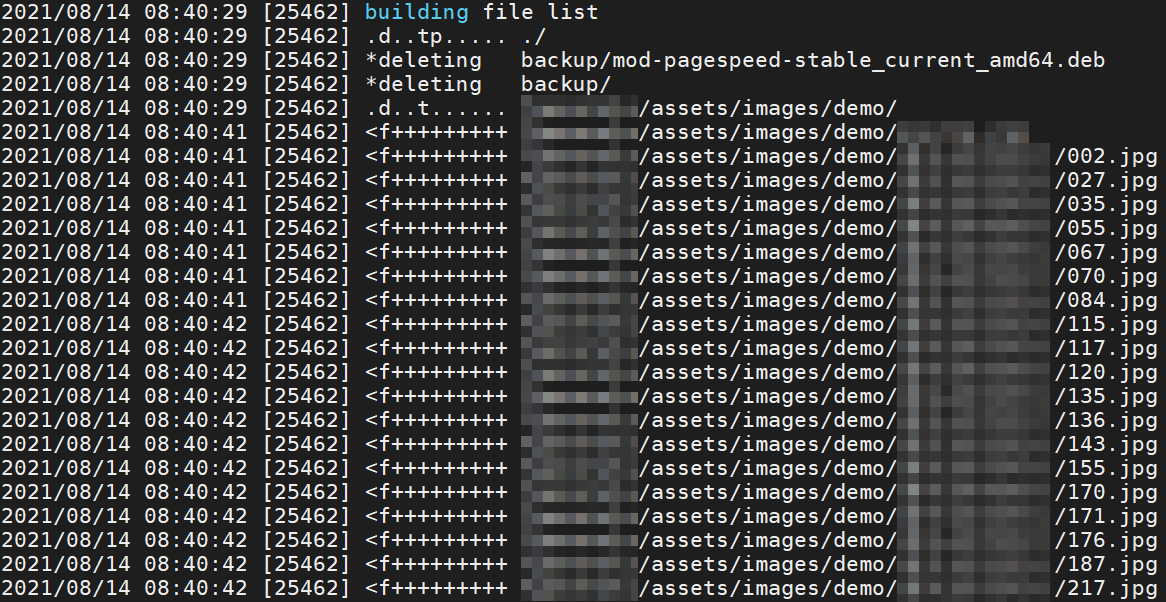
儲存下來的 log 檔內容長這樣
找回刪掉的檔案
這個小蛙卡了半天 … 要找回刪除的檔案必須要是 administrators 群組內的人才可以,如果想要用原本執行 rsync 的那個帳號的話,就不要把上面的 myaccount 從 administrators 群組移除,或是考量安全性,維持從 administrators 群組中移除 myaccount,要找回刪除資料的時候再透過 administrators 的其他帳號處理了。
而且要透過 Synology Drive (1),進入資源回收桶 (2) -> 右手邊有一個我的檔案 (3) -> 選到剛剛設定的空間,就可以看到被刪除的檔案囉!

加入 crontab 定期執行
小蛙要備份的檔案非常多,第一次會跑很久,就先直接下上面提到的指令讓他跑,跑完之後視需求設定到 crontab 內,讓 rysnc 每 10 分鐘將小蛙 /var/www/ 下有變動的檔案都同步到 Synology NAS 上,crontab 設定的方式如下 (更多使用方式與說明可參考 Linux 設定 crontab 例行性工作排程教學與範例)
root@xxxxxx:~# crontab -e

*/10 * * * * rsync -avh --log-file=/path/file.log --delete --exclude '#recycle/' --exclude '@eaDir' -e ssh /root/backup/ --progress
今天介紹的 如何將資料從 Linux 裝置 備份 至 Synology NAS ? 就到這邊啦!記下來給有需要的朋友參考。